
Installation of Tally Prime will require one to download the software, run it, and then configure it to one’s needs. Downloading and installing Tally Prime is a very easy exercise, and the steps are given here:
Step 1 :
Create a new folder named ‘My Company Data’ or any other name to store the company data created using Tally Prime.

Step 2 : Now Go https://tallysolutions.com
Step 3 : Click Download Button

Step 4 : Click Download Button

Step 5 : After downloading, right-click the setup file and click ‘Open’ as shown in the screen below.

Step 6 : . Now, a screen will be shown asking ‘Do you want to allow this app to make changes to your device?’” Click Yes

Step 7 : in Tally Prime Setup Manager –> Click Install

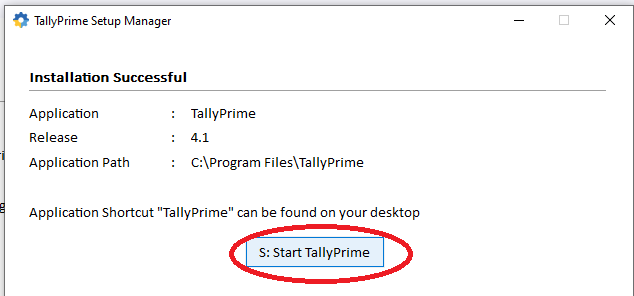
Step 8 : Click : Start Tally Prime
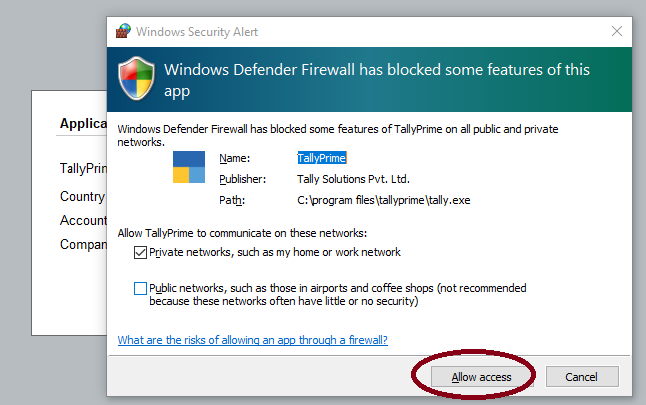
Step 9 : If the Windows Security Alert window appears, please click the ‘Allow Access’ button
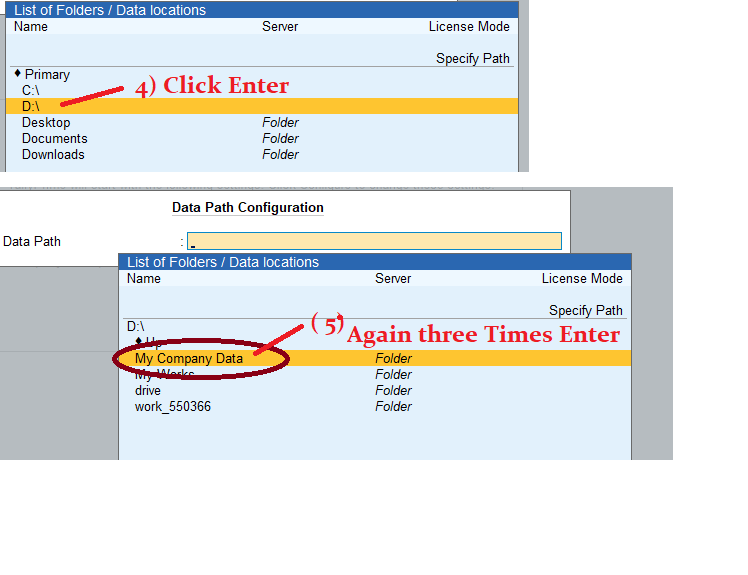
Step 10 : You must change the company data path from C:\ to another drive because C:\ contains Windows operating system files. If the OS gets corrupted, C:\ will be affected first. Therefore, change the data path to D:, E:, or any other drive except C:.
Click Configure > Click Company Data Path > Select from Drive > Select D:\ > Select My Company Data Folder (Already Created Folder Mentioned in Step 1) > Click Enter Three Times >

Step 11 : Finally you can see the below screen Company Data Path : D:\ My Company Data Click Enter

Step 12: Press Escape Key Twice up to see the below screen

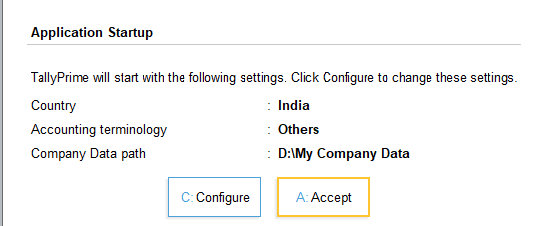
Step : 13 Now Click Accept (Note : Company Data Path : D:\ My Company Data)
Step : 14 Now Click Try it For Free(Educational)
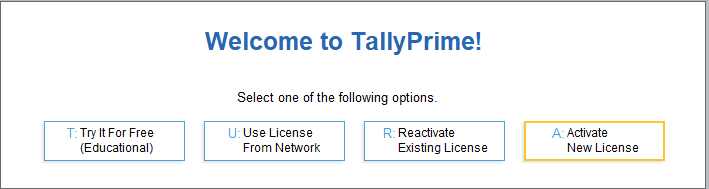
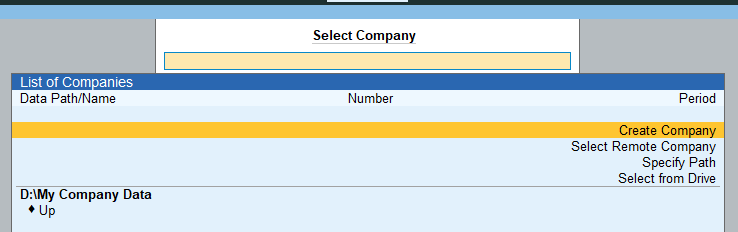
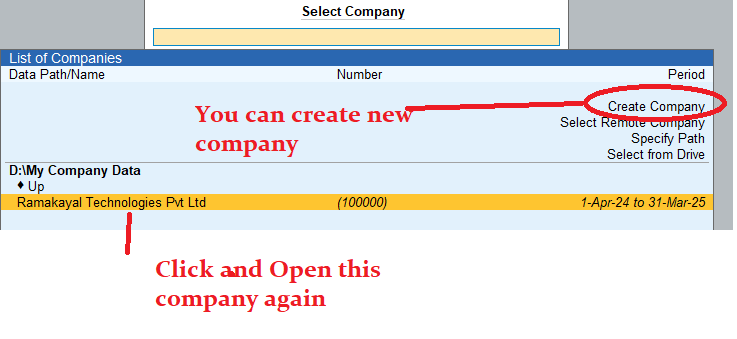
Step : 15 Finally, you will see the screen below. Click ‘Create Company’.
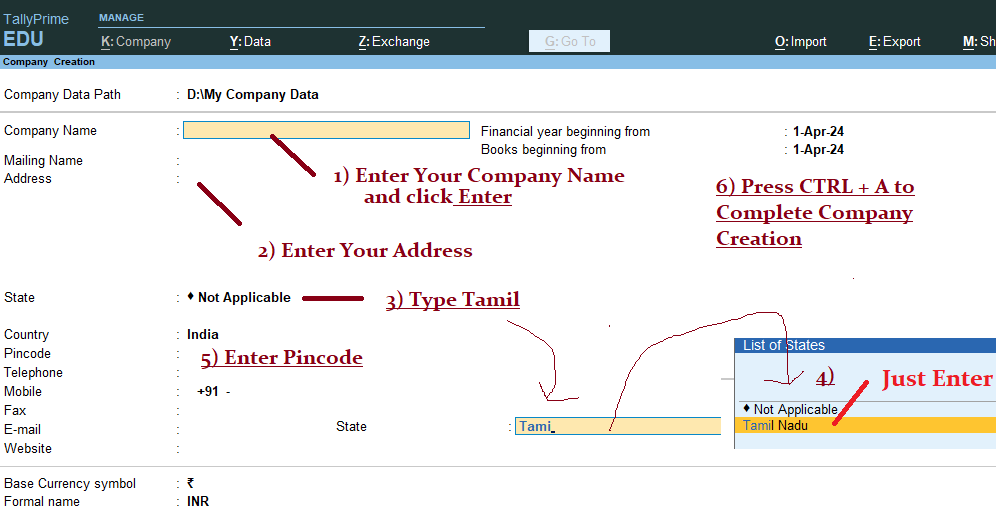
Step 16:
Enter the company name, address, state, and other details as shown in the screen below. You can skip some fields such as mobile, fax, website, etc. Finally, press Enter repeatedly until you see the ‘Accept’ prompt. Select ‘Yes’ or press Ctrl + A after entering the ‘Books Beginning from’ date.”
Step 17:
“Now that the company has been created successfully, you will see a screen as shown below. On this screen, select ‘No’ for ‘Maintain Inventory’ and set ‘Enable Goods and Services Tax (GST)’ to ‘No’ because we will enter some transactions without GST and items.”

Press CTRL + A to Complete
Step 18:
Now, the Gateway of Tally is displayed. It contains screens for Master Entry, Transactions, Reports, and more. To exit from this screen, press the Escape key repeatedly or Click Quit Button or click the ‘X’ button to close Tally Prime.

Step 19:
Now, go to the D:\ My Company Data. You will see the company data folder as shown in the screen below.”

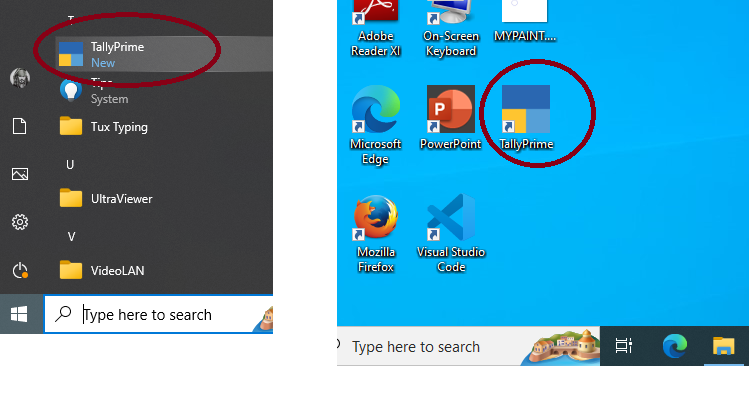
Step 20 : “How to open Tally Prime with my company?
in Desktop or Startup Menu > Click Tally Prime or Right Click > Open > Again click Educational Mode
Step : 20 The company that was already created is now opened automatically.

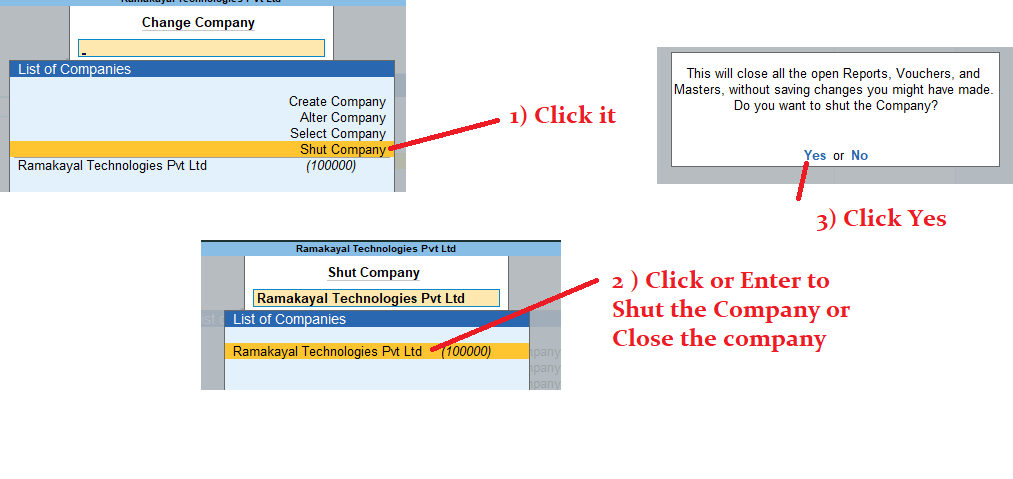
Step 21: Let us see how to alter company details and shut the company.”
Press F3 Key to Alter or Close Company

Now you will see the screen.
Click ‘Alter Company’ to change the company’s basic information, as seen in Step No. 16.
After changing the company data, press Ctrl + A to accept the changes.

To Shut Company:
Exercise:
- Create Two Companies:
- Create two companies named ABC Pvt Ltd and Golden India with some address details.
- Open the Folder:
- Navigate to the folder My New Company Folder.
- Open and Alter ABC Pvt Ltd:
- Open ABC Pvt Ltd.
- Alter the company data by changing the name from ABC Pvt Ltd to ABC Private Limited.
- Save the changes and close ABC Private Limited.
- Open and Alter Golden India:
- Open Golden India.
- Alter the company data by changing the company name and setting the Books Beginning From date to 1-Aug-2024.
- Save the changes and close Golden India.
- Open ABC Private Limited:
- Finally, open ABC Private Limited.
- Exit from Tally:
- Exit from Tally Prime.
You can now see the new folders in My Company Data.
Thanks for reading! If you liked these examples with images, please share this link.
If you have any doubts, please leave comments.
In the next session, we will learn how to create ledgers and explore accounting vouchers. Keep watching!
Thanks,
C. Saravanakumar