This example covers how to create ledgers and how they affect the profit and loss statement and balance sheet.
Please follow the steps and share your feedback in the comments section once completed
| Ledger Name | Group | Debit (₹) | Credit (₹) |
|---|---|---|---|
| Rama Capital Account | Capital Account | 5,00,000 | |
| Cash in Hand | Cash-in-Hand | 1,00,000 | |
| SBI A/c | Bank Accounts | 2,00,000 | |
| Sales | Sales Account | 3,00,000 | |
| Purchase | Purchase Account | 1,50,000 | |
| Sundry Debtor – A | Sundry Debtors | 50,000 | |
| Sundry Creditor – B | Sundry Creditors | 75,000 | |
| Office Equipment | Fixed Assets | 2,20,000 | |
| Salary Expenses | Indirect Expenses | 1,70,000 | |
| Rent Expenses | Indirect Expenses | 40,000 | |
| Outstanding Expenses | Current Liabilities | 30,000 | |
| Commission Received | Indirect Incomes | 25,000 |
Step 1:
Create a Company:
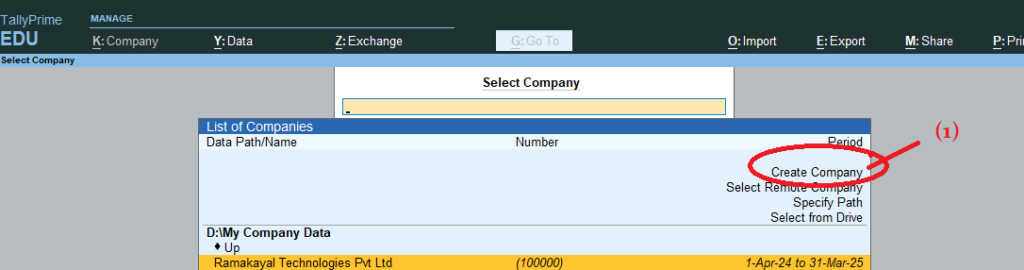
- Open Tally Prime & Click Create Company
2. Fill in the necessary details like company name, address, etc.,

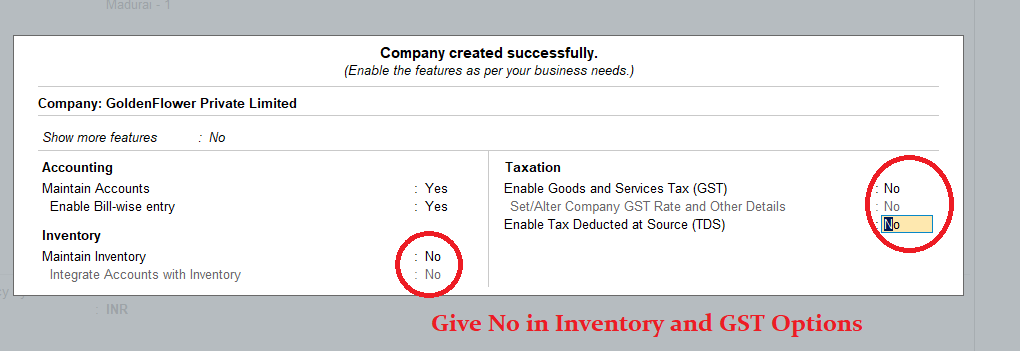
3) After accepting the company creation screen, you will see the Company Features window. Set the ‘Maintain Inventory’ option to ‘No’ and the ‘Enable Goods and Services Tax (GST)‘ option to ‘No.’ Ensure that these settings match the screen below
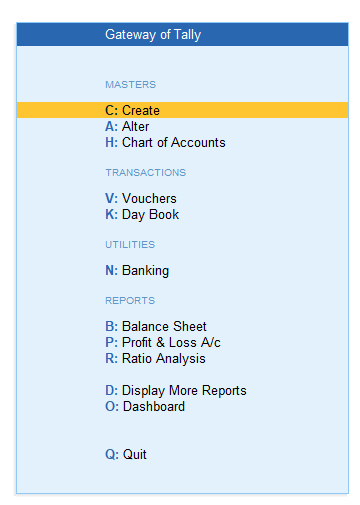
4) After accepting the company features screen (Note: To accept any screen, press CTRL + A), you will see the Gateway of Tally.
5) Now create a ledger name called Rama Capital account with opening balance : Rs. 5,00,000
| Ledger Name | Group | Debit (₹) | Credit (₹) |
|---|---|---|---|
| Rama Capital Account | Capital Account | | 5,00,000 |
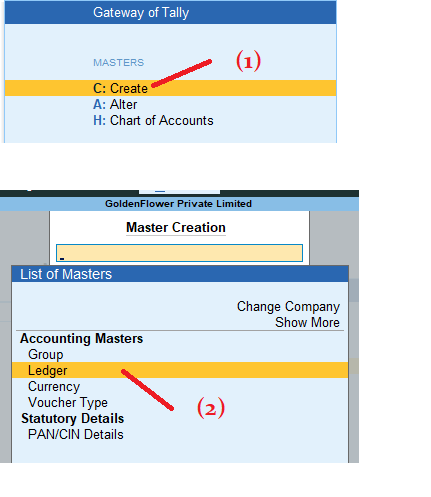
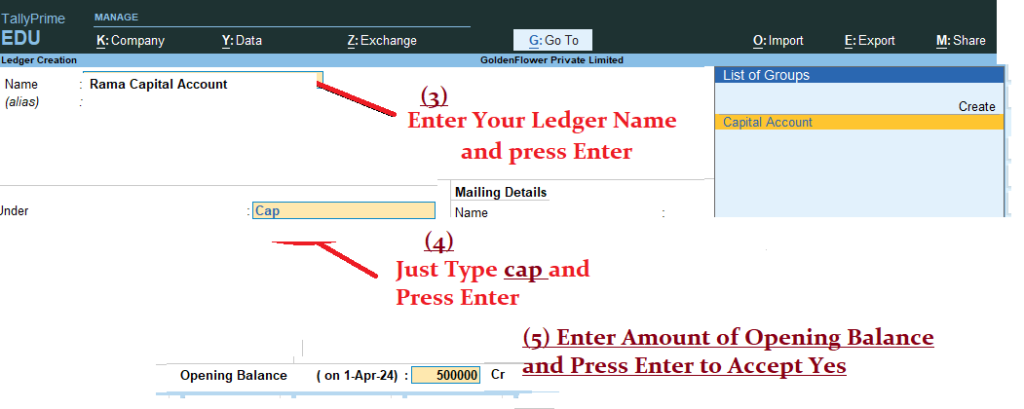
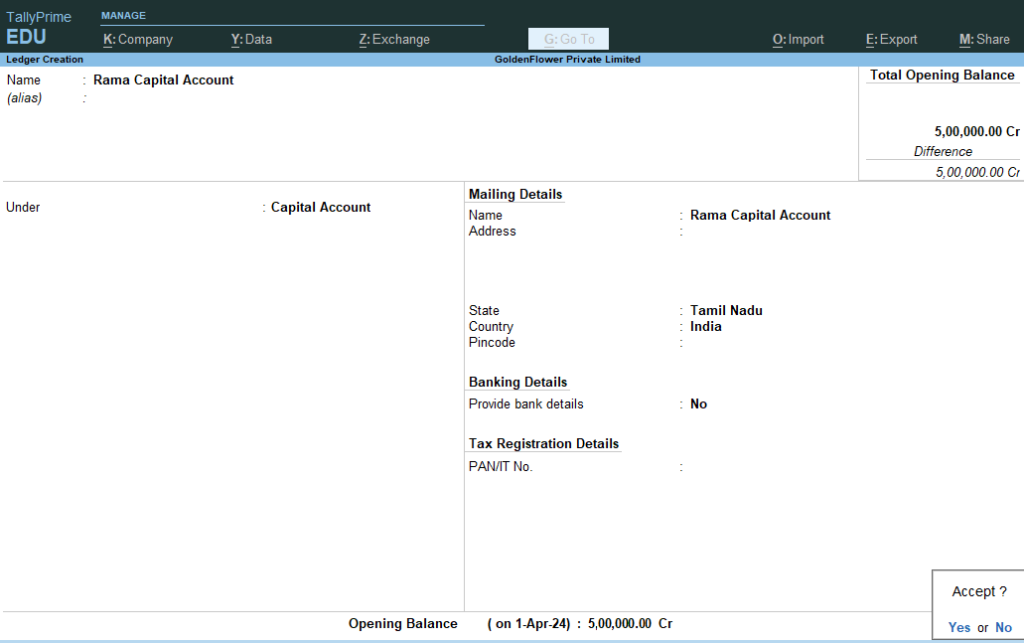
Gateway of Tally > Masters > Create > Ledger > Name : Rama Capital Account Under : Capital Account and Opening Balance 5,00,000 Cr> Accept Yes ( Now Press Escape key Twice to see Gateway of Tally)
6) Next
| Ledger Name | Group | Debit (₹) | Credit (₹) |
|---|---|---|---|
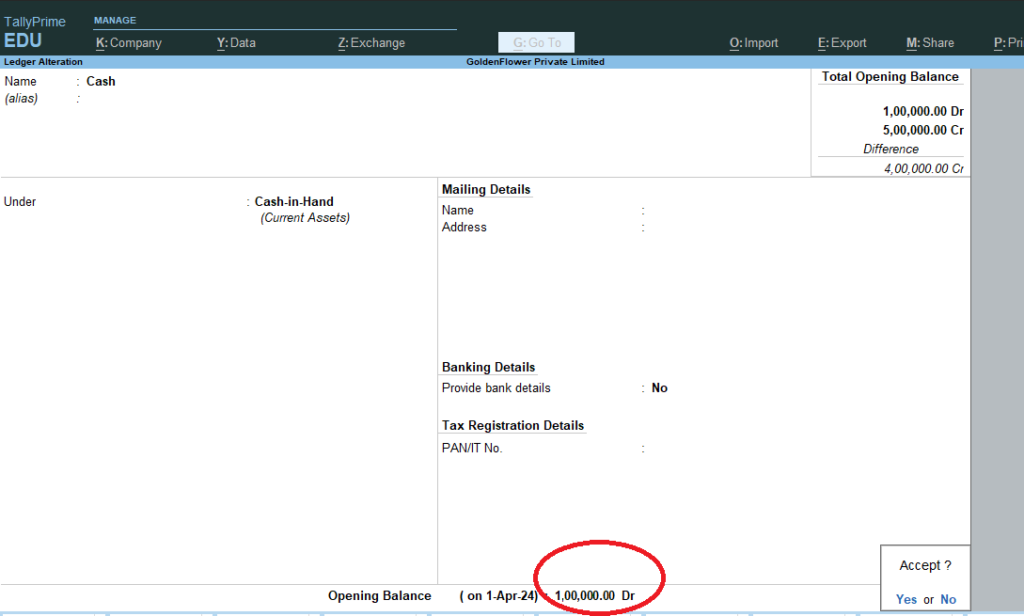
| Cash in Hand | Cash-in-Hand | 1,00,000 | |
Go Gateway of Tally > Masters > Alter > Ledgers > Select : Cash > Press Enter to see the below screen > Now Go to the Opening Balance Field using Enter Key > Give Opening Balance : 1,00,000 Dr > Accept : Yes
7) Now Press Escape again and again to see the Gateway of tally
Create the below ledgers using above steps >
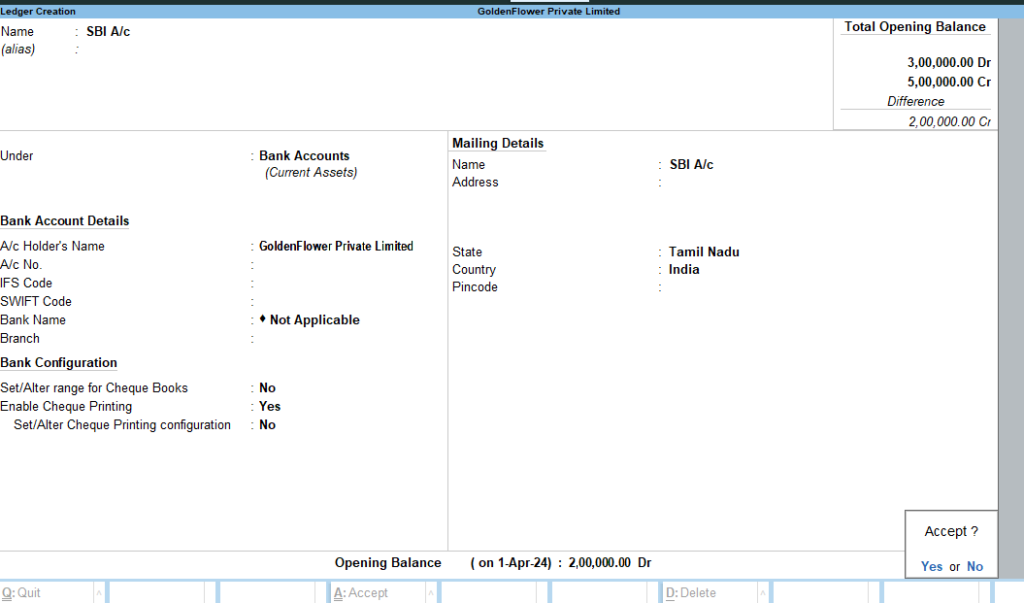
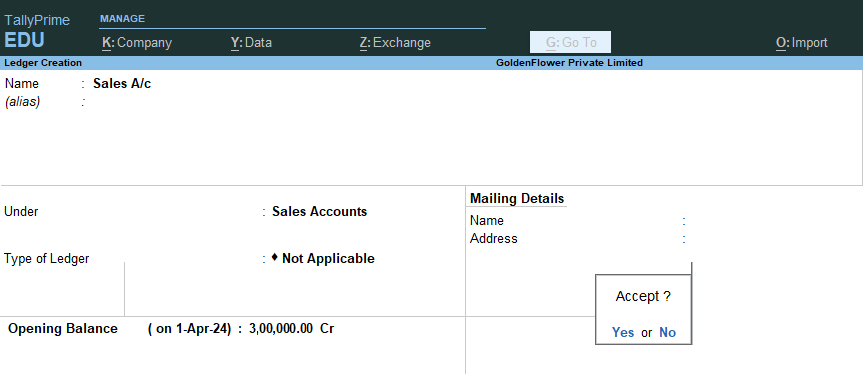
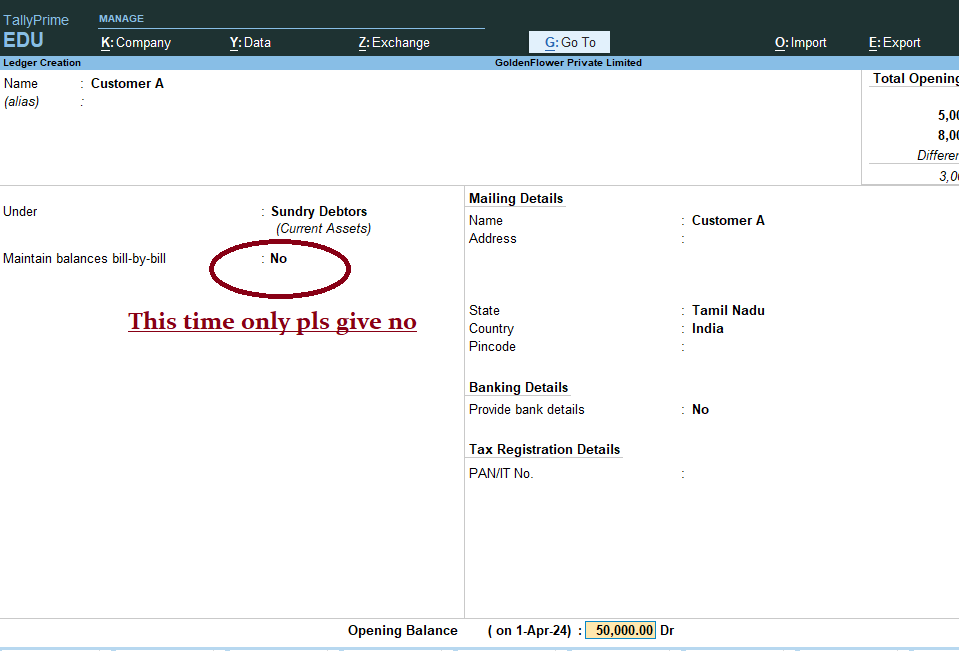
| Ledger Name | Group | Debit (₹) | Credit (₹) |
|---|---|---|---|
| SBI A/c | Bank Accounts | 2,00,000 | |
| Sales | Sales Account | | 3,00,000 |
| Purchase | Purchase Account | 1,50,000 | |
| Customer A | Sundry Debtors | 50,000 | |
| Supplier A | Sundry Creditors | | 75,000 |
| Office Equipment | Fixed Assets | 70,000 | |
| Salary Expenses | Indirect Expenses | 1,70,000 | |
| Rent Expenses | Indirect Expenses | 40,000 | |
| Outstanding Expenses | Current Liabilities | | 20,000 |
| Commission Received | Indirect Incomes | | 25,000 |
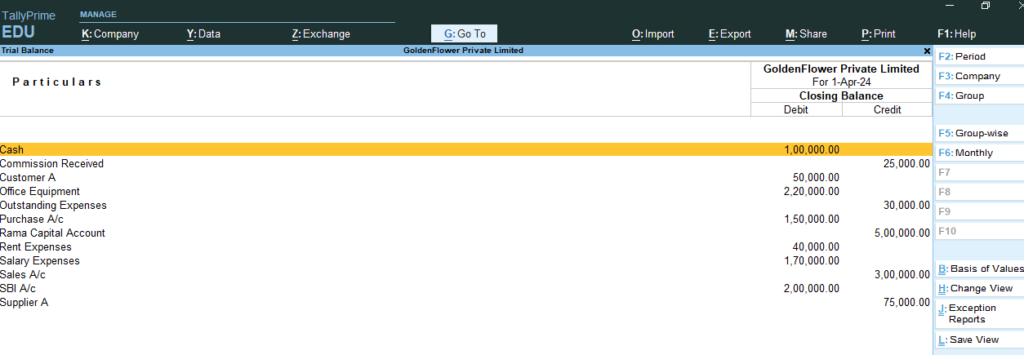
8) After Created the above all ledgers with Opening Balance as per trail balance
go Gateway of Tally > D: Display More Reports > T: Trail Balance >
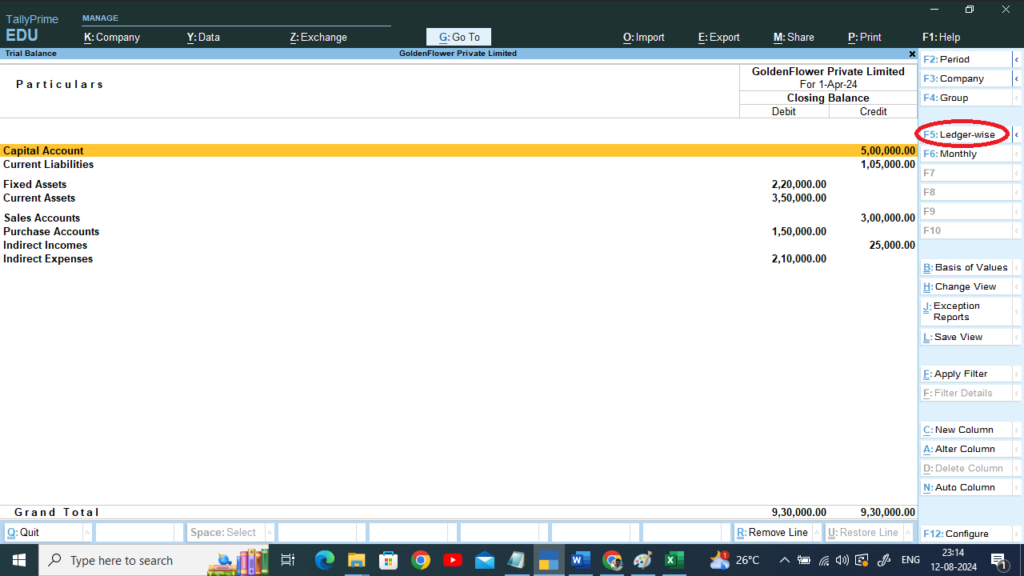
Press F5 > To See Ledger Wise >
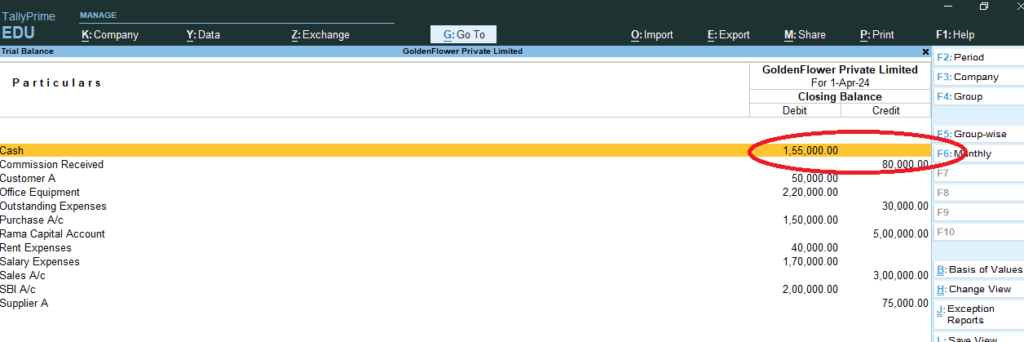
9) Now Goto Gateway of Tally > Masters : Alter > Ledgers > Commission Received > Change the Opening Balance Amount : 80000 Accept > Yes
10) Now Goto Gateway of Tally > Masters : Alter > Ledgers > Cash > Change the Opening Balance Amount : 155000– Accept > Yes
11) go Gateway of Tally > D: Display More Reports > T: Trail Balance >
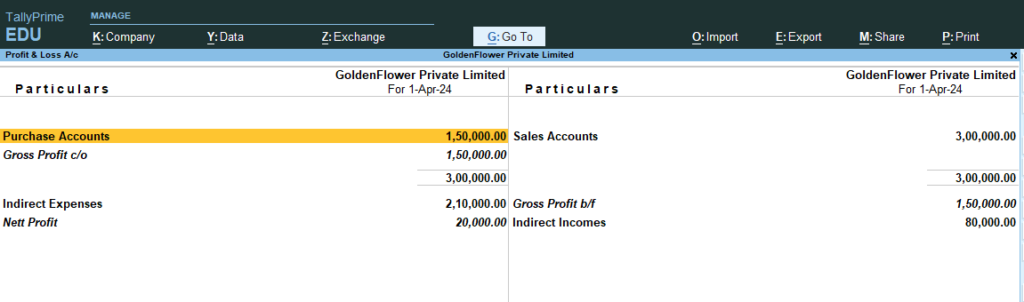
12) Gateway of Tally > Profit and Loss A/c
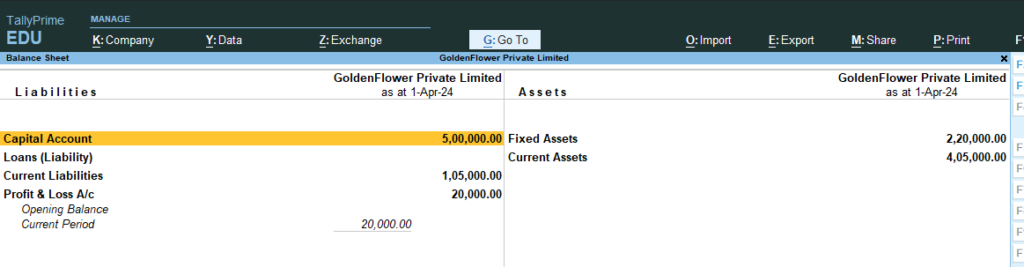
13) Gateway of Tally > Balance Sheet