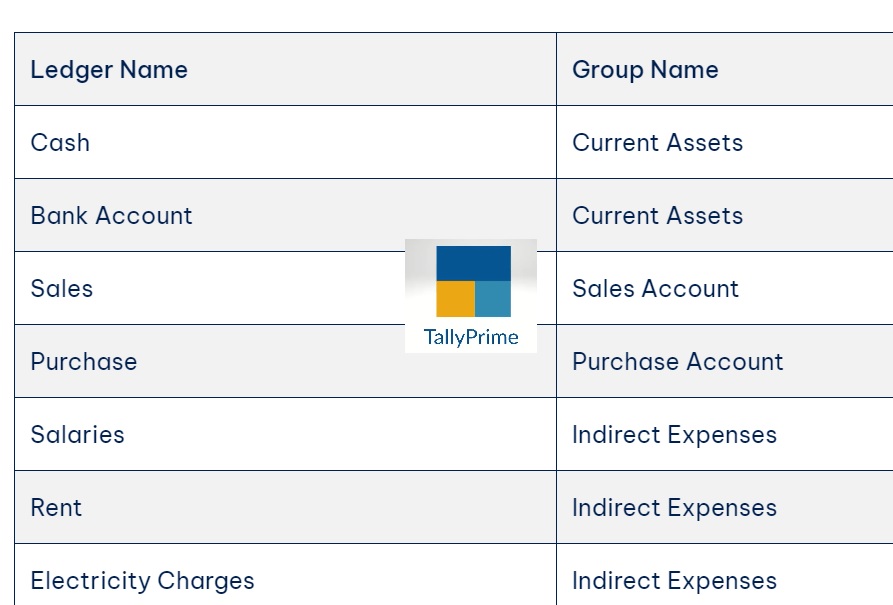
Author: Saravana Kumar

  • Overview of HTML and CSS

    Overview of HTML

    History of HTML

    HTML (HyperText Markup Language) is the standard language for creating web pages and web applications. It was developed by physicist Tim Berners-Lee in 1991 while he was working at CERN (European Organization for Nuclear Research). Here are some key milestones in the history of HTML:

    • 1991: Tim Berners-Lee proposed the first version of HTML, which included 18 tags such as <p>, <h1>, <a>, and <img>.
    • 1993: HTML 2.0 was developed by the Internet Engineering Task Force (IETF), standardizing HTML.
    • 1997: HTML 3.2 was released by the World Wide Web Consortium (W3C), incorporating more presentational tags and attributes.
    • 1999: HTML 4.01 became a W3C recommendation, introducing stricter standards and separating content from presentation using CSS.
    • 2014: HTML5 was released as a W3C recommendation, focusing on multimedia support, semantic elements, and APIs for complex web applications.

    Purpose of HTML

    HTML is used to structure content on the web. It defines the elements and their relationships on a webpage. Its primary purposes include:

    • Structuring Content: HTML provides a framework for organizing text, images, links, and other media into a coherent and navigable format.
    • Creating Links: HTML enables hypertext links to other web pages or resources, facilitating the web’s interconnected nature.
    • Embedding Media: HTML supports embedding multimedia content such as images, videos, and audio directly into web pages.
    • Semantics: HTML5 introduced semantic elements like <header>, <footer>, <article>, and <section> to give meaning to different parts of a document, improving accessibility and SEO.
    • Interactive Content: HTML, combined with CSS and JavaScript, allows for the creation of interactive and dynamic web applications.

    Basic Structure of HTML

    An HTML document is composed of a series of elements, which are defined by tags. Each element typically has an opening tag and a closing tag, with the content in between. Here is a breakdown of the basic structure:

    <!DOCTYPE html>
    <html>
      <head>
        <title>Page Title</title>
        <meta charset="UTF-8">
        <meta name="description" content="Brief description of the page">
        <link rel="stylesheet" href="styles.css">
      </head>
      <body>
        <header>
          <h1>Welcome to My Website</h1>
        </header>
        <nav>
          <ul>
            <li><a href="index.html">Home</a></li>
            <li><a href="about.html">About</a></li>
            <li><a href="contact.html">Contact</a></li>
          </ul>
        </nav>
        <main>
          <article>
            <h2>Article Title</h2>
            <p>This is a paragraph in the article.</p>
          </article>
          <section>
            <h3>Section Title</h3>
            <p>This is a paragraph in the section.</p>
          </section>
        </main>
        <footer>
          <p>&copy; 2024 My Website</p>
        </footer>
      </body>
    </html>

    Explanation of the Basic Structure:

    1. <!DOCTYPE html>: Declares the document type and version of HTML.
    2. <html>: The root element that contains all other elements.
    3. <head>: Contains meta-information about the document, such as the title, character set, and links to external resources like CSS.
    4. <title>: Sets the title of the webpage, which appears in the browser tab.
    5. <meta>: Provides metadata, such as the character encoding and description of the page.
    6. <link>: Links to external stylesheets or other resources.
    7. <body>: Contains the content of the document that is displayed in the browser.
    8. <header>: Represents introductory content, typically containing the website’s title or navigation links.
    9. <nav>: Contains navigation links.
    10. <main>: Represents the main content of the document.
    11. <article>: Represents a self-contained piece of content.
    12. <section>: Represents a thematic grouping of content.
    13. <footer>: Contains footer information, such as copyright notices.

    HTML is the backbone of the web, enabling the creation of structured, accessible, and interactive web pages. Its evolution continues to enhance the capabilities of web developers, making it easier to build complex and dynamic websites.

    Overview of CSS

    Role of CSS in Web Design

    CSS (Cascading Style Sheets) is a style sheet language used for describing the presentation of a document written in HTML or XML. CSS is essential in web design as it controls the visual and aural layout of web pages, allowing developers to create visually appealing and user-friendly interfaces. Here’s a look at its role and how it complements HTML:

    • Separation of Content and Presentation: HTML is used for structuring content, while CSS is used for styling. This separation makes the code more maintainable and the design more flexible.
    • Consistency Across Pages: CSS allows for the consistent styling of multiple pages by linking them to a single stylesheet, ensuring a uniform look and feel.
    • Enhanced User Experience: By controlling layout, typography, colors, and animations, CSS improves the usability and aesthetics of web pages.
    • Responsive Design: CSS enables the creation of responsive designs that adapt to various screen sizes and devices, improving accessibility and user experience.

    How CSS Complements HTML

    HTML structures the content, and CSS styles that content. Here’s how they work together:

    1. HTML Structure: HTML elements provide the basic structure and content of a webpage.
    2. CSS Styling: CSS rules are applied to HTML elements to define their appearance. These rules can control aspects like color, font, layout, and spacing.

    Basic Structure of CSS

    CSS is composed of rules that specify how HTML elements should be styled. Each rule consists of a selector and a declaration block. Here’s a breakdown:

    selector {
      property: value;
      property: value;
    }

    Example CSS:

    body {
      font-family: Arial, sans-serif;
      background-color: #f0f0f0;
      margin: 0;
      padding: 0;
    }
    
    h1 {
      color: #333333;
      text-align: center;
    }
    
    p {
      font-size: 16px;
      line-height: 1.5;
      color: #666666;
    }

    Explanation:

    • Selectors: Define which HTML elements the styles apply to. Examples include type selectors (body, h1, p), class selectors (.classname), and ID selectors (#idname).
    • Properties and Values: Each declaration within a rule set specifies a style property (e.g., color, font-size) and its corresponding value (e.g., #333333, 16px).

    CSS Syntax

    • Selectors: Identify the HTML elements to style.
    • Type Selector: Targets all elements of a given type (e.g., h1).
    • Class Selector: Targets elements with a specific class (e.g., .class-name).
    • ID Selector: Targets a single element with a specific ID (e.g., #id-name).
    • Properties: Define what aspect of the element’s style to change (e.g., color, font-size, margin).
    • Values: Specify the settings for the properties (e.g., #ffffff, 16px, 10px).

    CSS Modules and Features

    CSS is vast and includes several modules and features that enhance its capabilities:

    • Selectors: Advanced selectors like attribute selectors, pseudo-classes, and pseudo-elements.
    • Box Model: Defines how elements are sized and spaced, including properties like margin, border, padding, and width.
    • Flexbox and Grid Layout: Modern layout systems for creating complex, responsive designs.
    • Typography: Control over font properties, including font-family, font-size, font-weight, and line-height.
    • Color and Backgrounds: Color properties (color, background-color), gradients, and image backgrounds.
    • Transitions and Animations: Create smooth transitions and animations for dynamic effects.
    • Media Queries: Enable responsive design by applying styles based on device characteristics like screen width and resolution.

    Example of How CSS Complements HTML

    HTML:

    <!DOCTYPE html>
    <html>
    <head>
      <title>Sample Page</title>
      <link rel="stylesheet" type="text/css" href="styles.css">
    </head>
    <body>
      <header>
        <h1>Welcome to My Website</h1>
      </header>
      <main>
        <section>
          <p>This is a sample paragraph styled with CSS.</p>
        </section>
      </main>
      <footer>
        <p>&copy; 2024 My Website</p>
      </footer>
    </body>
    </html>

    CSS (styles.css):

    body {
      font-family: Arial, sans-serif;
      background-color: #f0f0f0;
      margin: 0;
      padding: 0;
    }
    
    header {
      background-color: #333333;
      color: white;
      text-align: center;
      padding: 1em 0;
    }
    
    h1 {
      font-size: 2em;
      margin: 0;
    }
    
    main {
      padding: 1em;
    }
    
    p {
      font-size: 16px;
      line-height: 1.5;
      color: #666666;
    }
    
    footer {
      background-color: #333333;
      color: white;
      text-align: center;
      padding: 1em 0;
      position: fixed;
      bottom: 0;
      width: 100%;
    }

    In this example, the HTML provides the structure and content of the page, while the CSS defines the styles, ensuring that the page is visually appealing and well-organized.

    CSS is a powerful tool that, when used alongside HTML, enables web developers to create sophisticated, accessible, and visually engaging web pages.

  • Event handling in the DOM with JavaScript

    1. What are Events?

    • Events are actions or occurrences that happen in the system you are programming, which the system can detect and act upon.
    • Examples include clicks, mouse movements, keypresses, and page loads.

    2. Event Handlers

    • Event handlers are functions that get called when events occur.

    3. Adding Event Handlers

    • addEventListener(): This method is used to register an event handler on a DOM element.
      var element = document.getElementById('myButton');
      element.addEventListener('click', myFunction);
    • Inline Event Handlers: You can also attach event handlers directly to HTML elements.
      <button onclick="myFunction()">Click me</button>

    4. Event Object

    • Event Object: When an event occurs, the browser creates an event object containing information about the event.
    • This object is passed as an argument to the event handler function.

    5. Event Types

    • There are many types of events, including:
    • Mouse Events: click, mouseover, mouseout, mousemove, etc.
    • Keyboard Events: keydown, keypress, keyup.
    • Form Events: submit, change, focus, blur.
    • Document and Window Events: load, resize, scroll, etc.

    6. Basic Example

    <!DOCTYPE html>
    <html>
    <head>
      <title>Event Handling</title>
    </head>
    <body>
      <button id="myButton">Click me</button>
      <script>
        // Define the event handler function
        function handleClick(event) {
          alert('Button clicked!');
        }
    
        // Get the button element
        var button = document.getElementById('myButton');
    
        // Attach event listener to the button
        button.addEventListener('click', handleClick);
      </script>
    </body>
    </html>

    7. Removing Event Handlers

    • removeEventListener(): Removes an event listener from an element.
      element.removeEventListener('click', myFunction);

    8. Example

    Step 1: HTML Markup

    <!DOCTYPE html>
    <html lang="en">
    <head>
        <meta charset="UTF-8">
        <meta name="viewport" content="width=device-width, initial-scale=1.0">
        <title>Event Handling</title>
    </head>
    <body>
        <button id="myButton">Click me</button>
        <div id="output"></div>
        <script src="script.js"></script>
    </body>
    </html>

    Step 2: JavaScript Code (script.js)

    // Accessing DOM elements
    const button = document.getElementById('myButton');
    const output = document.getElementById('output');
    
    // Event handler function
    function handleClick() {
        output.textContent = 'Button clicked!';
    }
    
    // Adding event listener to the button
    button.addEventListener('click', handleClick);

    Explanation:

    1. HTML Markup: We have a simple HTML file with a button element and a div element to display the output. We include a JavaScript file (script.js) where our event handling logic resides.
    2. JavaScript Code:
    • We first access the DOM elements we need: the button with id myButton and the output div with id output.
    • We define an event handler function handleClick() that changes the text content of the output div to ‘Button clicked!’.
    • We use addEventListener() to attach a click event listener to the button. When the button is clicked, it will execute the handleClick() function.

    Output:

    When you click the button labeled “Click me”, the text inside the output div will change to “Button clicked!”.

    Additional Example: Event Parameter

    Let’s enhance our example to display the coordinates of the click when the button is clicked.

    // Updated event handler function
    function handleClick(event) {
        const x = event.clientX;
        const y = event.clientY;
        output.textContent = `Button clicked at (${x}, ${y})`;
    }

    Now, when you click the button, the output will show the coordinates of the click within the browser window.

    Output:

    If you click the button at different positions on the webpage, the output will show the coordinates of the click.

    These examples illustrate the basic concept of event handling in the DOM using JavaScript, along with a slightly more advanced example of handling event parameters.

    9. Understanding Event Flow

    • Event flow refers to the sequence in which events are handled on a webpage.
    • Events can propagate in two ways:
    • Event Bubbling: Events start from the target element and move up the DOM hierarchy to the root.
    • Event Capturing: Events start from the root and move down to the target element.

    10. Event Phases

    • Event Capturing Phase: The event travels from the root to the target element.
    • Target Phase: The event reaches the target element.
    • Event Bubbling Phase: The event travels from the target element back up to the root.

    11. Using addEventListener() with Event Phases

    • The third parameter of addEventListener() can control the event phase.
      element.addEventListener(eventType, handlerFunction, useCapture);
    • By default, useCapture is set to false, which means the event will be handled during the bubbling phase.
    • To handle events during the capturing phase, set useCapture to true.

    12. Stopping Event Propagation

    • stopPropagation(): Prevents further propagation of the current event in the capturing and bubbling phases.
      event.stopPropagation();

    13. Event Delegation Revisited

    • Event delegation can take advantage of event bubbling.
    • Instead of attaching event listeners to individual elements, you attach a single event listener to a parent element.
    • Events will bubble up from the target element to the parent element, where you can handle them.
    • This is particularly useful for dynamically added elements.

    14. Event Object Properties

    • The event object passed to the event handler contains useful properties and methods:
    • event.target: Refers to the element that triggered the event.
    • event.currentTarget: Refers to the element that the event handler is attached to.
    • event.preventDefault(): Prevents the default behavior of the event.
    • event.stopPropagation(): Stops the propagation of the event.

    15. Practical Examples

    Example 1: Event Delegation

    <ul id="myList">
      <li>Item 1</li>
      <li>Item 2</li>
      <li>Item 3</li>
    </ul>
    
    <script>
      var list = document.getElementById('myList');
      list.addEventListener('click', function(event) {
        if (event.target.tagName === 'LI') {
          alert('Item clicked: ' + event.target.innerText);
        }
      });
    </script>

    Example 2: Stopping Event Propagation

    <button id="outer">Outer Button</button>
    <button id="inner">Inner Button</button>
    
    <script>
      var outer = document.getElementById('outer');
      var inner = document.getElementById('inner');
    
      outer.addEventListener('click', function(event) {
        alert('Outer button clicked!');
        event.stopPropagation(); // Stops event propagation
      });
    
      inner.addEventListener('click', function(event) {
        alert('Inner button clicked!');
      });
    </script>

    In this example, we’ll create a simple drawing application where users can draw on a canvas element by clicking and dragging the mouse.

    Step 1: HTML Markup

    <!DOCTYPE html>
    <html lang="en">
    <head>
        <meta charset="UTF-8">
        <meta name="viewport" content="width=device-width, initial-scale=1.0">
        <title>Drawing Application</title>
        <style>
            canvas {
                border: 1px solid black;
            }
        </style>
    </head>
    <body>
        <canvas id="drawingCanvas" width="400" height="400"></canvas>
        <script src="script.js"></script>
    </body>
    </html>

    Step 2: JavaScript Code (script.js)

    // Accessing the canvas element
    const canvas = document.getElementById('drawingCanvas');
    const context = canvas.getContext('2d');
    
    // Flag to track if the mouse button is pressed
    let isDrawing = false;
    
    // Function to start drawing
    function startDrawing(event) {
        isDrawing = true;
        draw(event);
    }
    
    // Function to draw on canvas
    function draw(event) {
        if (!isDrawing) return;
    
        const x = event.clientX - canvas.offsetLeft;
        const y = event.clientY - canvas.offsetTop;
    
        context.lineTo(x, y);
        context.stroke();
    }
    
    // Function to stop drawing
    function stopDrawing() {
        isDrawing = false;
        context.beginPath();
    }
    
    // Event listeners for mouse events
    canvas.addEventListener('mousedown', startDrawing);
    canvas.addEventListener('mousemove', draw);
    canvas.addEventListener('mouseup', stopDrawing);
    canvas.addEventListener('mouseout', stopDrawing);

    Explanation:

    1. HTML Markup: We have a canvas element where users can draw. We include a JavaScript file (script.js) where our drawing logic resides.
    2. JavaScript Code:
    • We access the canvas element and its 2D rendering context.
    • We define functions to handle starting drawing (startDrawing), drawing (draw), and stopping drawing (stopDrawing).
    • In startDrawing, we set isDrawing to true to indicate that drawing has started, and call the draw function.
    • In draw, we draw lines on the canvas as the user moves the mouse, using the mouse coordinates relative to the canvas.
    • In stopDrawing, we set isDrawing to false to indicate that drawing has stopped, and start a new path for the next drawing operation.
    • We add event listeners to the canvas for mouse events: mousedown to start drawing, mousemove to draw, mouseup and mouseout to stop drawing.

    Output:

    Users can draw on the canvas by clicking and dragging the mouse. The drawn lines will follow the movement of the mouse cursor within the canvas area.

    This example demonstrates more advanced event handling in the context of a drawing application, where event parameters such as mouse coordinates are utilized to enable drawing functionality.

    Conclusion

    Understanding event handling depth allows you to control how events are handled on your webpage efficiently. By mastering event flow, phases, and event object properties, you can create more interactive and responsive web applications. Practice using these concepts in different scenarios to become more proficient in event handling.

  • JavaScript Document Object Model (DOM)

    1. What is the DOM?

    • DOM stands for Document Object Model.
    • It is a programming interface for web documents.
    • The DOM represents the structure of a document (like an HTML or XML file) as a tree of objects.
    • Each part of the document (elements, attributes, text) is represented as a node.

    2. The HTML Structure

    Consider a simple HTML document:

    <!DOCTYPE html>
    <html>
      <head>
        <title>My First Page</title>
      </head>
      <body>
        <h1>Hello, World!</h1>
        <p>This is a paragraph.</p>
      </body>
    </html>
    • This HTML document has a hierarchical structure, starting with the <html> element, which contains <head> and <body>, and so on.

    3. Accessing the DOM with JavaScript

    • JavaScript can interact with and manipulate the DOM.
    • You can use various methods provided by the document object to access elements.

    4. Selecting Elements

    • document.getElementById(id): Selects an element by its ID.
    • Example : To Selects element with id ‘header’
      var header = document.getElementById('header'); 
    • document.getElementsByClassName(className): Selects elements by their class name. // Selects element with class ‘paragraph’
      var paragraphs = document.getElementsByClassName('paragraph'); 
    • document.getElementsByTagName(tagName): Selects elements by their tag name. // Selects all <div> elements
      var divs = document.getElementsByTagName('div'); 
    • document.querySelector(selector): Selects the first element that matches a CSS selector. // Selects the first element with class ‘paragraph’
      var firstParagraph = document.querySelector('.paragraph'); /
    • document.querySelectorAll(selector): Selects all elements that match a CSS selector. // Selects all elements with class ‘paragraph’
      var allParagraphs = document.querySelectorAll('.paragraph'); 

    5. Manipulating Elements

    • Change content: You can change the content of an element.
    • // Changes the inner HTML of the element with id ‘header’
      var header = document.getElementById('header');
      header.innerHTML = 'New Header Text'; 
    • Change style: You can change the CSS styles of an element. // Changes the text color of the first <p> element to blue
      var paragraph = document.querySelector('p');
      paragraph.style.color = 'blue'; 
    • Add/Remove Classes: You can add or remove CSS classes from an element.
    • Adds a class ‘new-class’ to the first <p> element
    • Removes a class ‘old-class’ from the first <p> element
      var paragraph = document.querySelector('p');
      paragraph.classList.add('new-class'); 
      paragraph.classList.remove('old-class'); 

    6. Creating and Adding New Elements

    • Create a new element: You can create a new element using document.createElement(tagName).
      var newDiv = document.createElement('div'); 
    // Creates a new <div> element
    • Append the new element: You can add the new element to the document. // Adds the new <div> element to the end of the <body>
      var body = document.querySelector('body');
      body.appendChild(newDiv); 

    7. Event Handling

    • Add event listeners: You can add event listeners to handle user interactions. // Adds a click event listener to a button element
      var button = document.querySelector('button');
      button.addEventListener('click', function() 
      {
        alert('Button was clicked!');
      }); 

    8. Putting It All Together

    Here is a simple example that combines these concepts:

    <!DOCTYPE html>
    <html>
      <head>
        <title>My Interactive Page</title>
      </head>
      <body>
        <h1 id="header">Hello, World!</h1>
        <button id="changeTextButton">Change Text</button>
        <script>
          // Select the button and header
          var button = document.getElementById('changeTextButton');
          var header = document.getElementById('header');
    
          // Add click event listener to the button
          button.addEventListener('click', function() 
          {
            // Change the header text
            header.innerHTML = 'Text Changed!';
          });
        </script>
      </body>
    </html>
    • This HTML has a button that, when clicked, changes the text of the header.

    Conclusion

    • The DOM is a powerful interface for interacting with web documents.
    • JavaScript provides many methods for selecting and manipulating DOM elements.
    • You can create dynamic, interactive web pages by combining these techniques.

    By understanding these basic concepts, you can start to explore more advanced topics and build more complex web applications.

  • Overview of Python: Python’s history, its uses, and why it’s popular.

    History:

    • Birth: Python is a type of computer language. A guy named Guido van Rossum made it and introduced it to the world in 1991.
    • Guiding Principles: The people who made Python wanted it to be easy to read and write. They said, “Let’s make it so that you can understand what’s happening just by looking at the code.”
    • Evolution: Like how animals evolve, Python also got better over time. There are different versions, but the newest one is called Python 3.

    Uses:

    • Web Development: People use Python to build websites. It’s like making a house, but on the internet.
    • Data Science: Scientists use Python to understand big amounts of data. It’s like finding patterns in a lot of information.
    • Automation: Python helps with boring tasks on the computer, like copying files or sending emails automatically.
    • Game Development: Some people create video games with Python. It’s like writing a story and making it interactive on the computer.
    • Desktop Applications: People make regular computer programs with Python. These could be anything from a simple calculator to a music player.

    Popularity:

    • Easy to Learn: Python is like learning a new language, but an easy one. People can start using it without getting too confused.
    • Large Community: Many people around the world use Python. If you have a question or need help, you can find lots of friendly people to assist you.
    • Versatile: Python can do many different things. It’s like a Swiss Army knife for programming!
    • Lots of Helpful Tools: There are many extra things you can add to Python to make it do even more. It’s like having a big box of toys to play with.
    • Used Everywhere: Companies and smart people all over the world use Python for their projects. It’s like the cool kid in school that everyone wants to be friends with.

    In simple words, Python is a friendly language that helps you do lots of cool stuff on the computer, and many people love it!

  • How to use Hibernate option windows 7-10-11

    In Windows 7, Windows 10, and Windows 11, the hibernate option allows you to save your current session to the hard drive and power off your computer completely. When you turn on your computer again, you can resume your work right where you left off. Here’s how to use the hibernate option on each operating system:

    Windows 7:

    1. Open the Start Menu: Click on the Start button located in the lower-left corner of the screen.
    2. Access the Power Options: Type “Power Options” in the search box and press Enter. Alternatively, you can navigate to Control Panel > Hardware and Sound > Power Options.
    3. Change Plan Settings: Next to your selected power plan, click on “Change plan settings”.
    4. Enable Hibernate: In the next window, click on “Change advanced power settings”.
    5. Enable Hibernate Option: Scroll down until you find “Sleep” and expand it. Then, expand “Hibernate after” and set the value to your preferred time or choose “Never” to always have the hibernate option available.
    6. Save Changes: Click on “OK” to save the changes.

    To hibernate your Windows 7 computer:

    • Press the power button briefly (if configured to hibernate when the power button is pressed).
    • Or, click on the arrow next to the “Shut down” button in the Start menu and select “Hibernate”.

    Windows 10 and Windows 11:

    1. Open the Start Menu: Click on the Start button located in the lower-left corner of the screen.
    2. Access the Power Options: Type “Power & Sleep Settings” in the search box and press Enter. Alternatively, you can access it through Settings > System > Power & sleep.
    3. Choose Additional Power Settings: Under “Related settings”, click on “Additional power settings”.
    4. Enable Hibernate: In the Power Options window, click on “Choose what the power buttons do” on the left side.
    5. Change Settings: Click on “Change settings that are currently unavailable” if necessary.
    6. Enable Hibernate Option: Under the Shutdown settings section, check the box next to “Hibernate” to enable it.
    7. Save Changes: Click on “Save changes” to apply the changes.

    To hibernate your Windows 10 or Windows 11 computer:

    • Press the power button briefly (if configured to hibernate when the power button is pressed).
    • Or, click on the power button in the Start menu and select “Hibernate”.

    Following these steps, you can easily enable and use the hibernate option on Windows 7, Windows 10, and Windows 11.